News:

Classified ads are not allowed on the forum.

Main Menu
Menu

Show posts

This section allows you to view all posts made by this member. Note that you can only see posts made in areas you currently have access to.

Show posts Menu

Messages - hgger69

#121
You should never underestimate the coolness factor with a cowl plenum air system, and that adds a bunch of hp:s, guys!  8)
#122
Mild Modifications / Re: The Hugger goes ZL-1....
December 02, 2016, 10:34:52 AM
Went to the Motorshop yesterday morning before work and now the balancing act is done! I took the chance to be part of the final adjustments and it was fun though I´ve never seen this before.

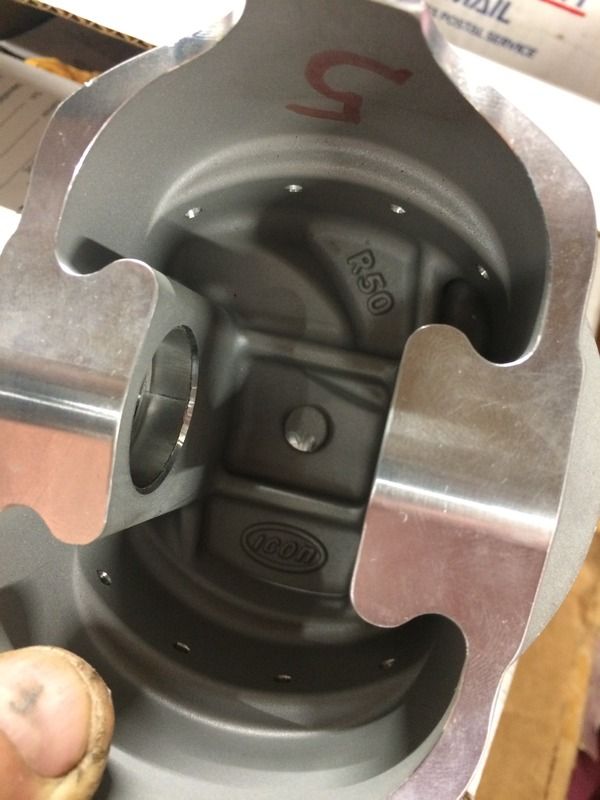
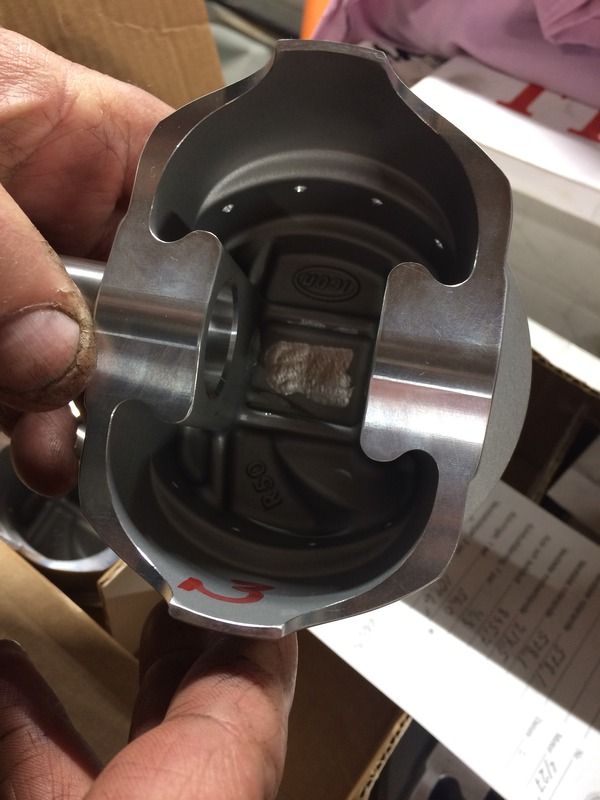
First the pistons had to be fully weight adjusted within 1/10 gram. The pics below shows how different pistons had to be adjusted. Theese pistons from ICON were, according to Ulf at the shop, very good for being American parts! It differed 5 gram between all of the them in weight! Like Ulf said; - It´s god raw material for balancing!


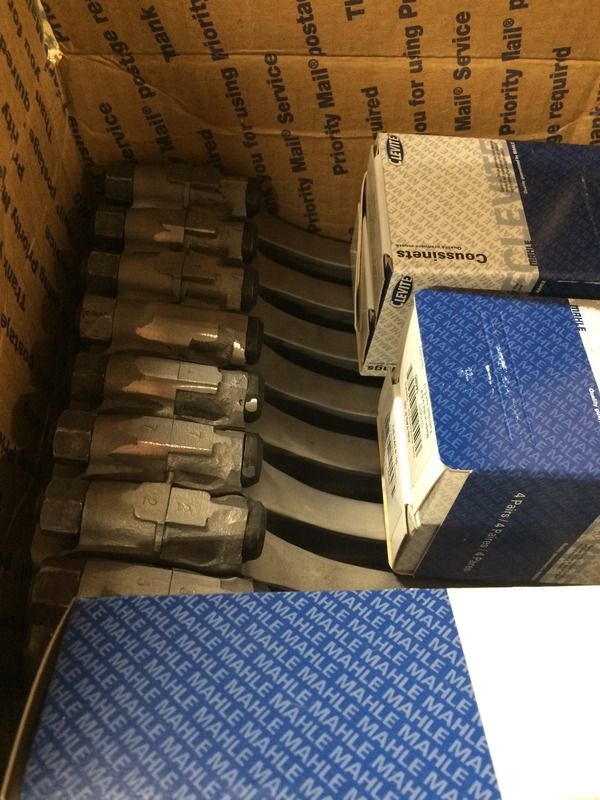
Also the rods had to be adjusted within 1/10 gram and here the weight difference were 7 gram. Here they are ready to me mounted with new bearings from Clevite.


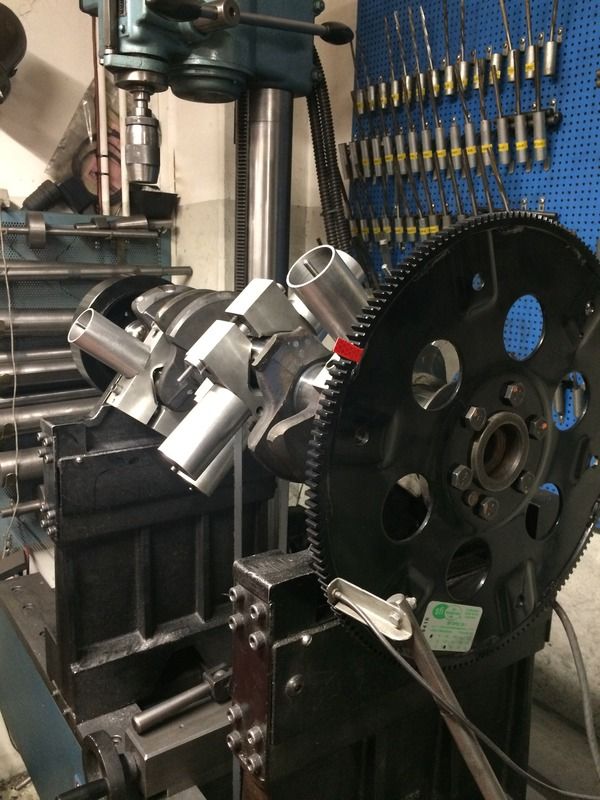
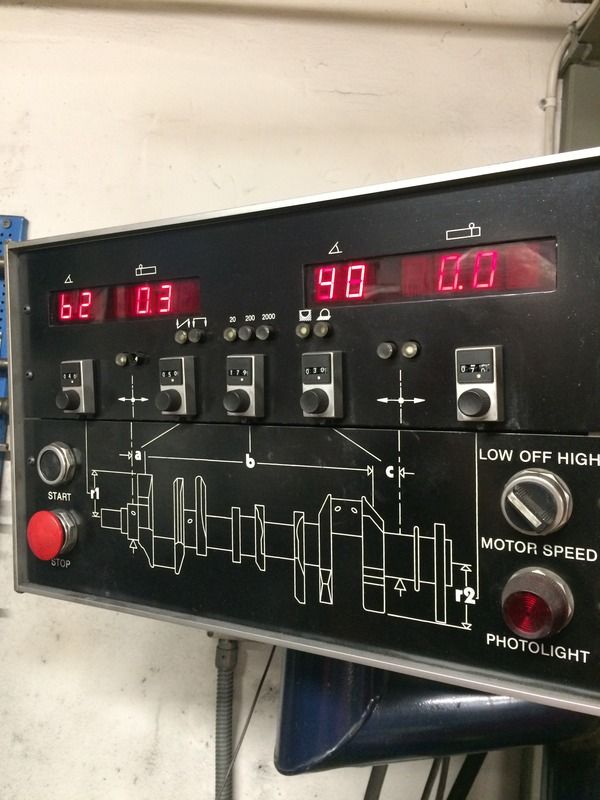
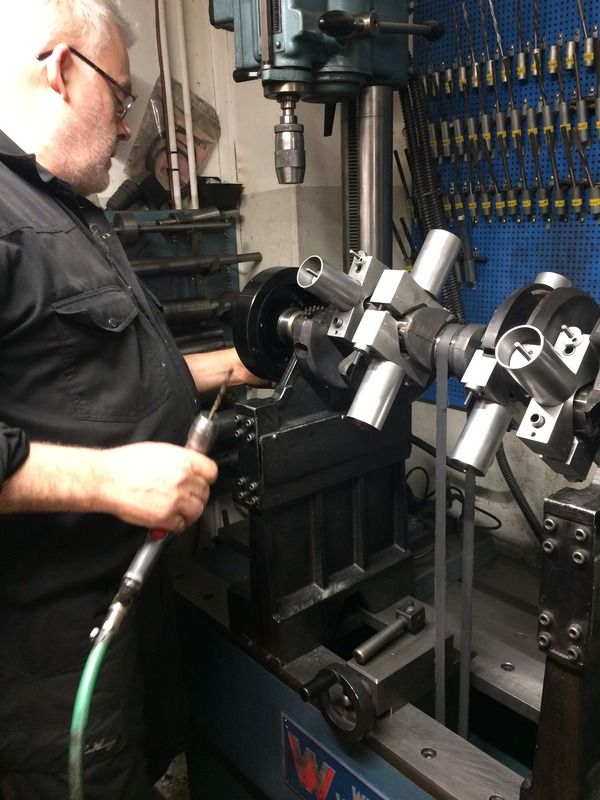
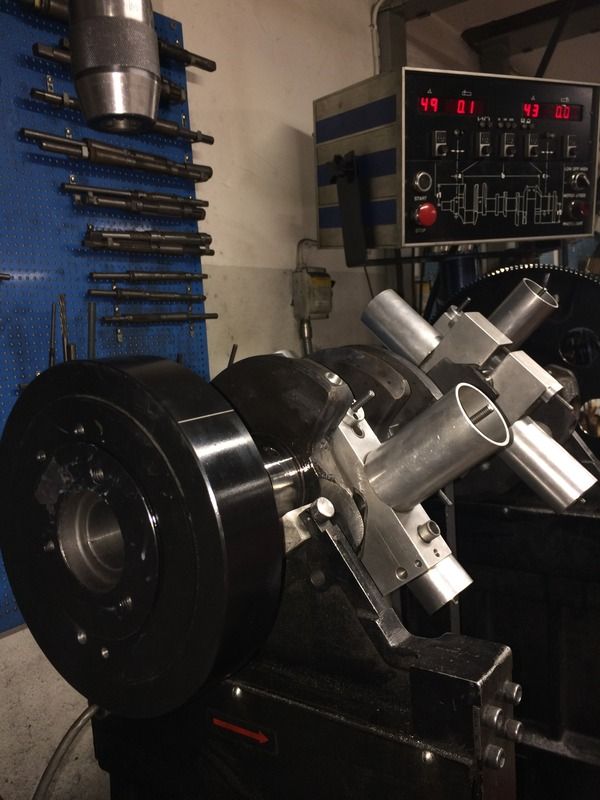
Here is the crank, with damper and flexplate mounted, balancing bench. The SFI-approved flexplate from SCAT were internal balanced from factory and Ulf was very satisfied with it.


The figures were 0,0 on the flexplate side and 0,3 on the damper side....not ok at all said Ulf!


After finding the exact right spot he adjusted, read used a drilling tool, the damper a bit and the figure went down to 0,1 which Ulf thought was ok!


Now even Ulf was happy!


This was probably the last update for this year cause other projects is knocking on Ulfs door but we´ll get back early next year for more updates!

We wish you all a Merry X-am and a Happy New Year!


#123
Mild Modifications / Re: The Hugger goes ZL-1....
December 02, 2016, 05:04:40 AM
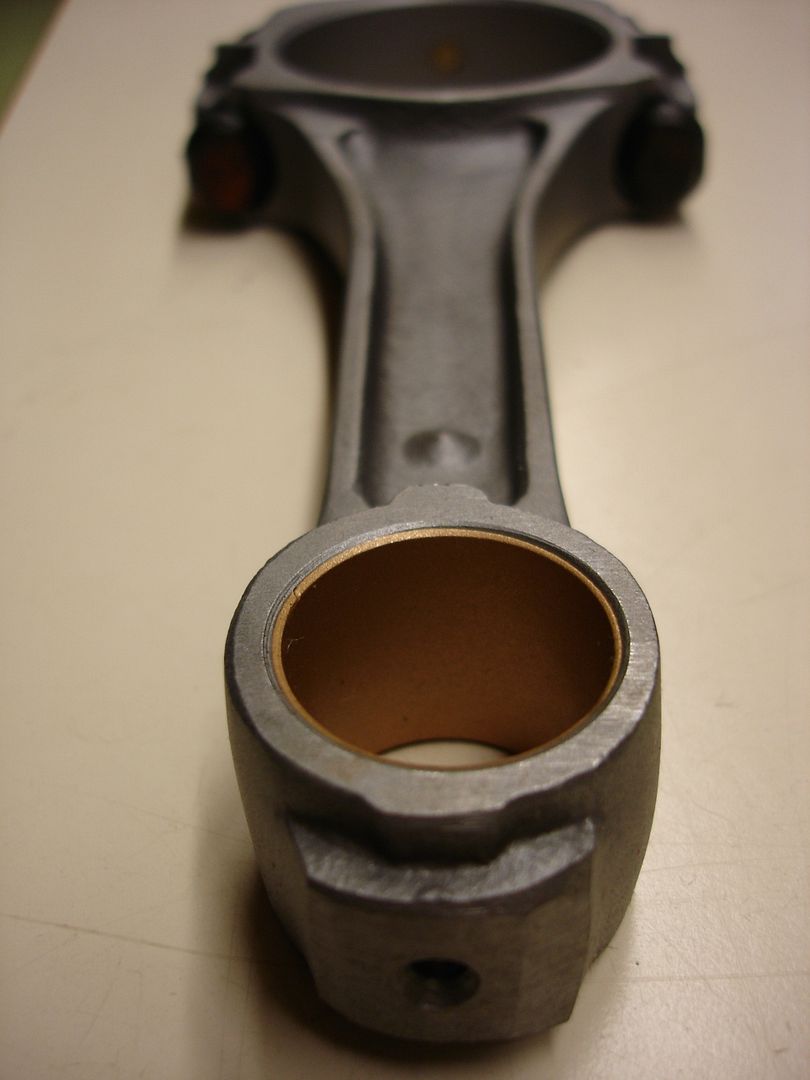
I really don't know, Steve but these are probably not from an original ZL-1! The dot rods were used in a range of high performance engines such as the L88, ZL1 and LS7.

Here´s a close-up of the small end if this is what you looking for:


#124
Mild Modifications / Re: The Hugger goes ZL-1....
November 30, 2016, 04:22:04 AM
Well, isn't much happening with the motor build right now but at least our motor shop has started to work with the balancing act! :)
He´s taking our ZL-1 between other projects and that's our deal....we rather go slow and correct then fast and wrong!  :P

Here´s one of the pistons and pin on the scale::


The old dot rods has gotten a deep clean and new bushings. He also has reamed the new bushings to fit the new pins to get correct tolerances. These rods are the type with full-floating pins.


After this each rod will go through a balance act, so to speak:


I´ll try to update here whenever new work is put in by the shop.....
#125
Quote from: X33RS on November 09, 2016, 02:29:42 PM
Even with all the restoration mistakes, the one plus that I can take away from it, at least we are looking at an X77 that someone didn't add the exterior trim...
I agree with you here...but aren't the front and rear lights trim added? ;)
#126
Thank you William, for this excellent description, I really appreciate it!  :)
It's this kind of information that make this web site the best in the world regarding knowledge of our first gen Camaros!
All this information you just gave me should be added to the CRG article because it's hard to read that info out right now...

My friends X77D80 is also a 06A car so that would be perfect with that picture. I'll send you a PM.
Have you seen my question regarding the 723 interior painting? Maybe you have pictures of that to?

Wasn't  it hard to mask and paint the trunk lid whith the spoiler already mounted?

How exactly do you mean the rear striping are ment to be on the 69? Is it the 5/8" gap to the rear window you mean or do you refer to the spacing between the stripes....?
#127
Quote from: ZLP955 on November 09, 2016, 05:18:47 AM
Try this link, then scroll down to the bottom of the page for the same image I posted above, the quality of this one may be a little better:
http://paintref.com/cgi-bin/chipdisplay.cgi?year=1969&manuf=GM&smodel=Camaro&info=yes&page=6

Thank you!
Now when its easier to read I started wondering what's correct again....according to this all interior should be both black and Midnight Green when you have interior code 723??...or is it just me?  :o
And what is black and what is green..... ::)
#128
Nobody?  ???
#129
Wow, thanks for quick response, Tim!  :)
Do you have a larger pic of that color chart...it was a bit hard to read?!  :P

Great pics also, now I understand how we should paint!  :D
#130
Hi,
I'm trying to help a friend with the restoration of his X77D80 car with 57/57 paint and I now I'm trying to figure out the paint process here....I've read the article here at CRG, http://www.camaros.org/assemblyprocess.shtml, but I must have this established before we send the car for the repaint:

Is this the correct step for a X77 paint job?

1. The 57-code main paint is sprayed as described from the factory.
2. The firewall is then blacked-out.
3. The unmasked cowl area under the cowl vent panel and the masked panel itself is painted white (Dover white 50?). In this process the firewall will get overspray from the white?
4. The hood and body is masked for stripes and sprayed white.
6. The trunk is then painted with spatter paint etc
5. The spoiler and the deck lid is masked for the stripes separately, painted and then mounted together? How far under the spoiler is the trunk lid then painted?

What's the RAL/NCS code for the black firewall paint?

Here are some extracts from the article:
Color System: The bodies were sequenced to "batch-paint" by color as much as the build schedule allowed, to minimize the waste of thinner required to clear paint guns between colors. The interior was masked off, the body exterior was tacked-off, and it then entered the main color booth, where it got three coats of acrylic lacquer, sprayed automatically with vertical and horizontal reciprocating spray guns, with a 3-minute "flash" between coats, followed by a 10-minute bake at 200F to "skin" the surface prior to sanding. In the next stage, any surface defects were power- and hand-wet-sanded with mineral spirits, then wiped off prior to entering the final "reflow" oven. This bake lasted 30 minutes at 275F, where the lacquer surface softened and "re-flowed" to a uniform gloss.

The last process for a non-stripe car was the blackout booth, where the firewall was blacked-out, the trunk was sprayed with spatter paint, and sound-deadening undercoat material was sprayed in the rear wheelhouses. The rear "cocktail shakers" on convertibles were suspended in the trunk for spatter painting, but weren't bolted in place until later in the Trim Shop, after the taillights and marker lights were installed.

If the car required Z28, Z10, or Z11 stripes or a black rear end panel or rockers, they were masked and manually sprayed in the in-line repair booth/oven system after the reflow oven, including the cowl vent panel; spoilers were painted body color separate from the body, and were final-installed to the deck lid just prior to the repair booth. The rear window filler panel, deck lid and spoiler were masked and sprayed stripe color in the repair booth, and baked in the repair oven before the body went back downstairs to the Trim Shop. The paint guns in the repair booth were fed from manifolds that were part of the main color circulating system so that the repair booth used exactly the same paint the main color booths were using.


#131
Hi,
I´m helping a friend with the restoration of his X77D80 06A built car and I have some quests regarding the interior and what was painted or just black!

I found these when I searched this web site:
Quote from: JohnZ on December 29, 2009, 10:08:00 AM
Everything inside a car with a 723 Midnight Green interior would be dark green except for the instrument cluster and the seat belts (unless it was ordered with deluxe seat belts). It would not have left the plant with a black dash pad and headrests.

Quote from: KurtS on December 29, 2009, 07:27:01 PM
The instrument cluster would be painted dark green on the sides of it.

1. Should the steering column be Midnight Green as well?
2. What is the RAL or NCS-code for that Midnight Green interior color?
3. Where can I find an example of the only the outside instrument cluster paint?
#132
Mild Modifications / Re: The Hugger goes ZL-1....
November 02, 2016, 12:44:35 PM
Quote from: BULLITT65 on November 02, 2016, 09:57:51 AM
congrats on ride of the month. Sometimes it takes submitting more than once, there is a lot of nice rides competing over there.
Thanx, it was really great to be the choosen this time and it feels great that there are more people then me that appreciates my ride!  8)
But you neither have any clues either regarding the numbers on the new ZL-1 block?  :(
#133
Mild Modifications / Re: The Hugger goes ZL-1....
November 02, 2016, 03:48:54 AM
Quote from: hgger69 on October 12, 2016, 08:11:16 AM
The original ZL-1 block had #3946052/53. I was surprised to se this new number was ending with a "D", #394605D.
Does anybody know why its a "D" in the end instead of a "2" or "3"? My guess is that there is an issue with the owners rights or similar between Winters Foundry and GM....? Could "D" stand for "Developed"....or Dumbass...or Deamon....or maybe Doomed? :o

Come on now, guys....someone have a clue, don't´ya?  :P
#134
Quote from: lynnbilodeau on November 01, 2016, 07:36:59 PM
I am guessing William is talking about the repops when he says it usually chips the plastic when removing the strips.
I have removed the stainless strips from several original GM lenses, and never had an issue on those.
OK, that sounds interesting, Lynn!  :)
I'm not sure what kind of lenses I have on the car right now...they do look old but I'm not sure!?
Exactly how were they mounted, snapped on or glued?

I've been in contact with NPD and CI regarding this problem and how easy it would be to offer a correct repro standard lens for the 69 Camaro just NOT adding the vertical trim moldings during the process, I mean how hard could it be?
Just got the answer from NPD and they couldn't do anything to help...not surprised there!  ::) ...but he gave me the suppliers name so I redirected the same quest to them so now its just a matter of time before we all know!  ;D  :o
#135
Quote from: william on October 29, 2016, 11:55:10 AM
That's probably what there is. You can try to remove the vertical trim on style trim lens but it usually chips the plastic.

We had an NOS pair for our COPO project of years ago and I haven't seen another since. I believe they were discontinued/superseded in the early '70s.
That's a pity....they should do the opposite...produce the lens without the trim and then you can ad it by yourself when needed!  ::)